Wednesday, July 21, 2010

Sharing Collections

Part of my motivation in starting this blog was to share a peek of what behind the scenes looked like for a collections person. My favorite things to share are cool objects from the collection, and box making. Because making boxes, or object mounts more generally, is one of my favorite activity. One of my goals, once the collection move was completed, has been to photograph our collection objects and get those photos online, so that you all can see what I get to see everyday, and so that I can learn more about them from people who know more than me! Because I'm always looking to expand my knowledge about the collections.

This past week I've begun uploading some photos to Flickr. Why flickr? It's fairly cheap, easy to get access to, and you can comment on it! Also, I've seen that other museums, like the Magnes Museum have been sharing their collections there. So I've sent out a trial balloon - uploading 408 images of our collection.

Agates from the Bentley Collection
387 photos of beautiful agates.
20-013

Baskets from the Collection
An incomplete photoset - it will be expanded as we photograph more of our baskets. But baskets are a wonderful and important aspect of our collection, and we believe that the more we can learn about them, the greater the stories we can tell.
03-460

And now, a question: What sort of objects would you like to see from our collection? What interests you most?

Tuesday, April 6, 2010

Crash course in mount making

Because we are a small museum, I end up wearing many hats. In addition to being collections manager, I also dabble in exhibit production and installation. To that end, I've begun to learn how to make mounts for objects on exhibit.

Last year, through a small grant from the University, the museum was able to purchase a heating element and some plexi glass. This year, as we began to develop our exhibits in house, we started to really use the tools we had on hand.

The heating element and our very high tech method of lining up and stabilizing plexi - lumber with lines drawn on it.
Working with plexiglass

The rod in the heating element gets very very hot, and the plexi, when placed above it, softens and becomes pliable, allowing us to bend and manipulate the material. When I began experimenting with the heater and plexi, I used some 1/2" plexi we had laying around. Unbeknownst to me, 1/2" plexi is really tricky stuff to work with. I quickly discovered the trickiness - the plexi wound strain against the bend lines, causing striations.
Working with plexiglass

I had better luck working with our 1/8" plexi, which is much easier to deal with. Seeking guidance, Andy Granitto, Curator of Exhibitions at the Yakima Valley Museum offered to give myself and programming manager, Angie Koch some pointers. Which we gladly took him up on.

Armed with my new, increased understanding of mountmaking, I was faced with my first challenge - mount a pipe in the middle of an exhibit case, preferably so it would look more or less like it was floating. After a couple of sketches, I decided that a tall, freestanding shelf would serve our needs. So that's what I made from plexi.
Working with plexiglass

I embedded the bottom of the stand in an ethafoam block to provide a more stable base. The pipe is attached to the stand through use of monofilament. The process was definitely a learning experience, but it's very exciting to be able to achieve a professional look in house.
Working with plexiglass

Friday, April 2, 2010

A Mammoth Undertaking

Yes, we are milking that pun for all it's worth. And maybe more...

In any case, we've gone a little mammoth crazy around here. If you're not local, you may not have heard about the Wenas Creek Mammoth, which was discovered a few years ago about 35 miles south of campus. It's kind of a big deal. Several large bones have been unearthed, including a humerus, femur and vertebrae. The project was even featured in the History Channel's Journey to 10,000 BC (the only link on the History Channel website seems to be to their video shop - but at least it has a description).

And now, the Wenas Creek Mammoth project will be our inaugural exhibit of our Window on Central series, small exhibits which showcase work being done on and around campus. The exhibit itself will be featured in our hallway facing corner display case, but a mammoth calls for something a little more... dramatic. Like a full size mammoth in the lobby.

Mammoth in the lobby

And how does one create a full size mammoth? In this case, interim museum director Bill Wood enlarged and refined artist's Carl Buell's rendering of the mammoth and separated it into sections we can print with our 24" plotter. Once printed, the strips were cut down to fit on pieces of foam core and then glued to the foam core. Then we reassembled the whole thing on the lobby wall. No small project!

We started near the front and worked out.
Mammoth in the lobby

Bill Wood places the final tusk piece.
Mammoth in the lobby

When it was all done, we put together this little video of the process.


Definitely a lot of fun, and a very cool thing to have in the lobby.

Monday, March 29, 2010

Class Project Part 2: Rehousing a Peruvian Knit Bag

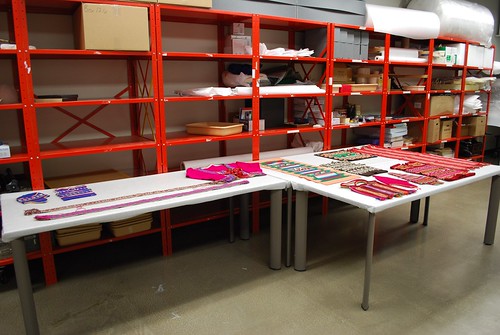
A while ago, I mentioned that CWU's Curation and Collections Management class is working with some of our textiles. Part of their assignment included working with me to rehouse the object they chose.

Using a series of videos from the Minnesota Historical Society as our guide, we set out to house the textiles. The first piece we did was a small knitted bag, probably from Peru.
Rehousing: Peruvian knitted bag

The bag had two major needs: a new tag to replace the fading ink on its current tag, and some padding, to relieve pressure on the creases that had formed from being stored flat for many year.
Rehousing: Peruvian knitted bag

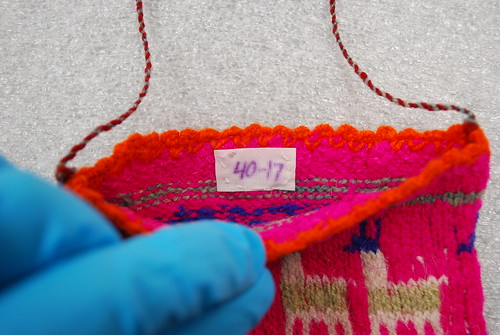
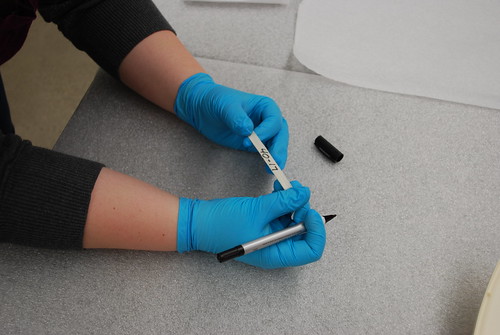
Our first step was to relabel the object. To do so, I first removed the old tag, very carefully, so as not to pull on the knit stitches of the fabric. Meanwhile, Taylor, a student in the class, wrote the catalog number on a piece of twill tape with an Identi-pen; this will be our new label.
Rehousing: Peruvian knitted bag

Sewing labels to textiles is always a very delicate procedure. The sewing needle and thread need to be very carefully placed between the thread or yarn of the textile that needs to be labeled. To sew down this label, I tacked both ends of the label to the bag without tying knots that might pull on the fibers and cause stress or damage.

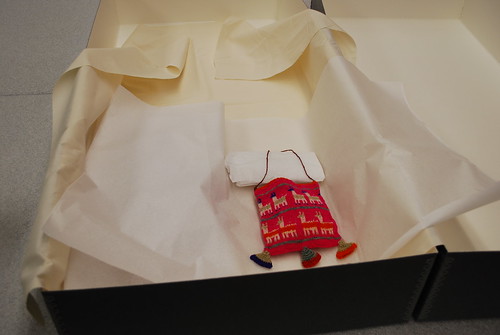
We then padded out the bag with some unbuffered acid free tissue paper. In this rather unscientific process, we crumple some tissue paper and place it inside the bag, giving it some bulk and taking some pressure off of the creases that have developed from years of being stored flat.

Rehousing: Peruvian knitted bag

We then placed the stuffed bag on another sheet of unbuffered acid free tissue paper which will serve as a handling sling, allowing us to easily lift the bag into and out of the box in which it will be stored. In this case we also added a small pillow to stabilize the delicate 'handle' on the bag.
Rehousing: Peruvian knitted bag

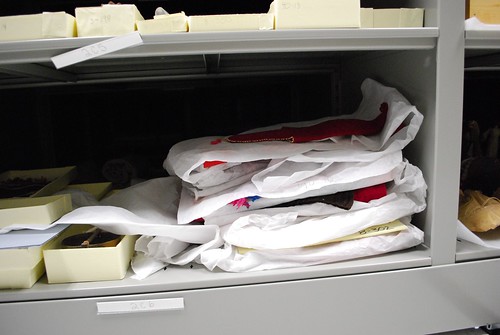
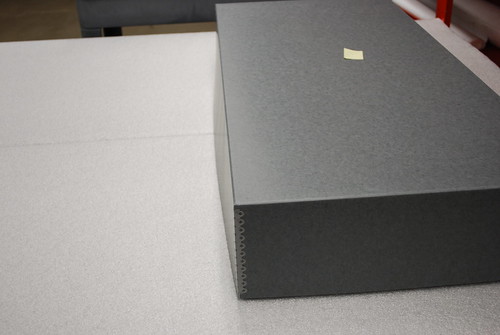
In the interest of space, many textiles will be stored in a single box. Each piece will have a tissue paper sling, and a larger muslin sling will allow us to take all the pieces out of the box at the same time.
Rehousing: Peruvian knitted bag

Finally, the box is closed up and put back into storage until the textile is needed for research or exhibit.
Rehousing: Peruvian knitted bag

Each of the students in the class had a different textile to work with, and each faced different challenges to housing it appropriately. By the end of the quarter, each piece was successfully rehoused and readied for storage. A very successful project!

Friday, March 26, 2010

And we're back!

We keep ourselves pretty busy around here. There's been a lot going on - new exhibits, learning new techniques, installing a mammoth in the lobby. Yep. Full size mammoth in the lobby. It's awesome.

Mammoth in the lobby

More content coming over the next weeks.

Friday, February 26, 2010

Photo Friday: Beyond Black and White

Tigre Masks: Beyond Black and White

It's been a crazy month here at the Museum of Culture and Environment. A week ago we opened our second exhibit: Beyond Black and White: The Stories Behind Our Masks. We're especially excited about the exhibit for two reasons: it features lots of amazing masks from our own collection and we were able to work with CWU's Diversity Education Center.

The photo above shows our two tigre masks in their case, and you can see the reflection of the toro mask in the reflection. In the background are 20 masks created by students in conjunction with the Diversity Education Center.

From a collections standpoint, this exhibit was our first real try at mounting objects for exhibit, and we went for a fairly low tech approach. The tigre masks are supported by a custom carved block of ethafoam, with a small piece of volara under the chin to cushion the pressure point. Simple, but effective. Some of the other pieces were much trickier.

Friday, February 5, 2010

Class Project, part 1

One of the really neat things about having a museum as part of a university, particularly a university with a museum studies program, is that students have a chance to participate in the collections work. Every year, the museum studies program offers a class on curation and collections management. As part of that class, the students choose an object to research, catalog, and rehouse, if appropriate.

This year, the students are working on a collection of textiles. The textiles have not been researched or housed. In fact, when they were moved last year, they were in a stack in a box. That stack was transferred to the compactor storage, where it's stayed for the last year.
Textile project

To prepare for class today, I took the textiles from storage and laid them out in the collections workroom. The students each choose a piece to research and rehouse.
Textile project

I'm really glad the class will be working with these textiles. They need new storage - the flat storage is putting a lot of stress on the fibers, particularly on the knit pieces, which are meant to be three dimensional. I'm also glad these pieces are being examined, because I discovered that the ink used to mark the pieces is fading, in some cases quite badly.
Textile project

So I'll be replacing those labels that are fading before we finish this project completely. It should be very interesting to see what sort of information the students can find on these pieces.