Tuesday, April 6, 2010

Crash course in mount making

Because we are a small museum, I end up wearing many hats. In addition to being collections manager, I also dabble in exhibit production and installation. To that end, I've begun to learn how to make mounts for objects on exhibit.

Last year, through a small grant from the University, the museum was able to purchase a heating element and some plexi glass. This year, as we began to develop our exhibits in house, we started to really use the tools we had on hand.

The heating element and our very high tech method of lining up and stabilizing plexi - lumber with lines drawn on it.
Working with plexiglass

The rod in the heating element gets very very hot, and the plexi, when placed above it, softens and becomes pliable, allowing us to bend and manipulate the material. When I began experimenting with the heater and plexi, I used some 1/2" plexi we had laying around. Unbeknownst to me, 1/2" plexi is really tricky stuff to work with. I quickly discovered the trickiness - the plexi wound strain against the bend lines, causing striations.
Working with plexiglass

I had better luck working with our 1/8" plexi, which is much easier to deal with. Seeking guidance, Andy Granitto, Curator of Exhibitions at the Yakima Valley Museum offered to give myself and programming manager, Angie Koch some pointers. Which we gladly took him up on.

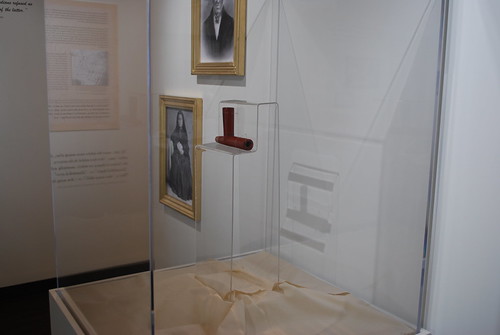
Armed with my new, increased understanding of mountmaking, I was faced with my first challenge - mount a pipe in the middle of an exhibit case, preferably so it would look more or less like it was floating. After a couple of sketches, I decided that a tall, freestanding shelf would serve our needs. So that's what I made from plexi.
Working with plexiglass

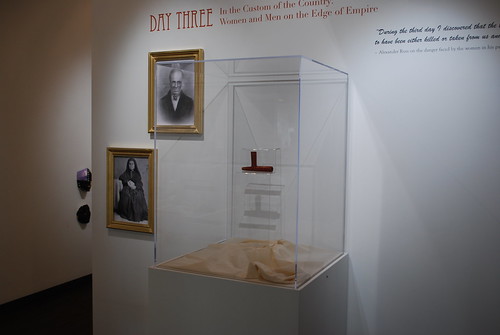
I embedded the bottom of the stand in an ethafoam block to provide a more stable base. The pipe is attached to the stand through use of monofilament. The process was definitely a learning experience, but it's very exciting to be able to achieve a professional look in house.
Working with plexiglass

Friday, April 2, 2010

A Mammoth Undertaking

Yes, we are milking that pun for all it's worth. And maybe more...

In any case, we've gone a little mammoth crazy around here. If you're not local, you may not have heard about the Wenas Creek Mammoth, which was discovered a few years ago about 35 miles south of campus. It's kind of a big deal. Several large bones have been unearthed, including a humerus, femur and vertebrae. The project was even featured in the History Channel's Journey to 10,000 BC (the only link on the History Channel website seems to be to their video shop - but at least it has a description).

And now, the Wenas Creek Mammoth project will be our inaugural exhibit of our Window on Central series, small exhibits which showcase work being done on and around campus. The exhibit itself will be featured in our hallway facing corner display case, but a mammoth calls for something a little more... dramatic. Like a full size mammoth in the lobby.

Mammoth in the lobby

And how does one create a full size mammoth? In this case, interim museum director Bill Wood enlarged and refined artist's Carl Buell's rendering of the mammoth and separated it into sections we can print with our 24" plotter. Once printed, the strips were cut down to fit on pieces of foam core and then glued to the foam core. Then we reassembled the whole thing on the lobby wall. No small project!

We started near the front and worked out.
Mammoth in the lobby

Bill Wood places the final tusk piece.
Mammoth in the lobby

When it was all done, we put together this little video of the process.


Definitely a lot of fun, and a very cool thing to have in the lobby.